

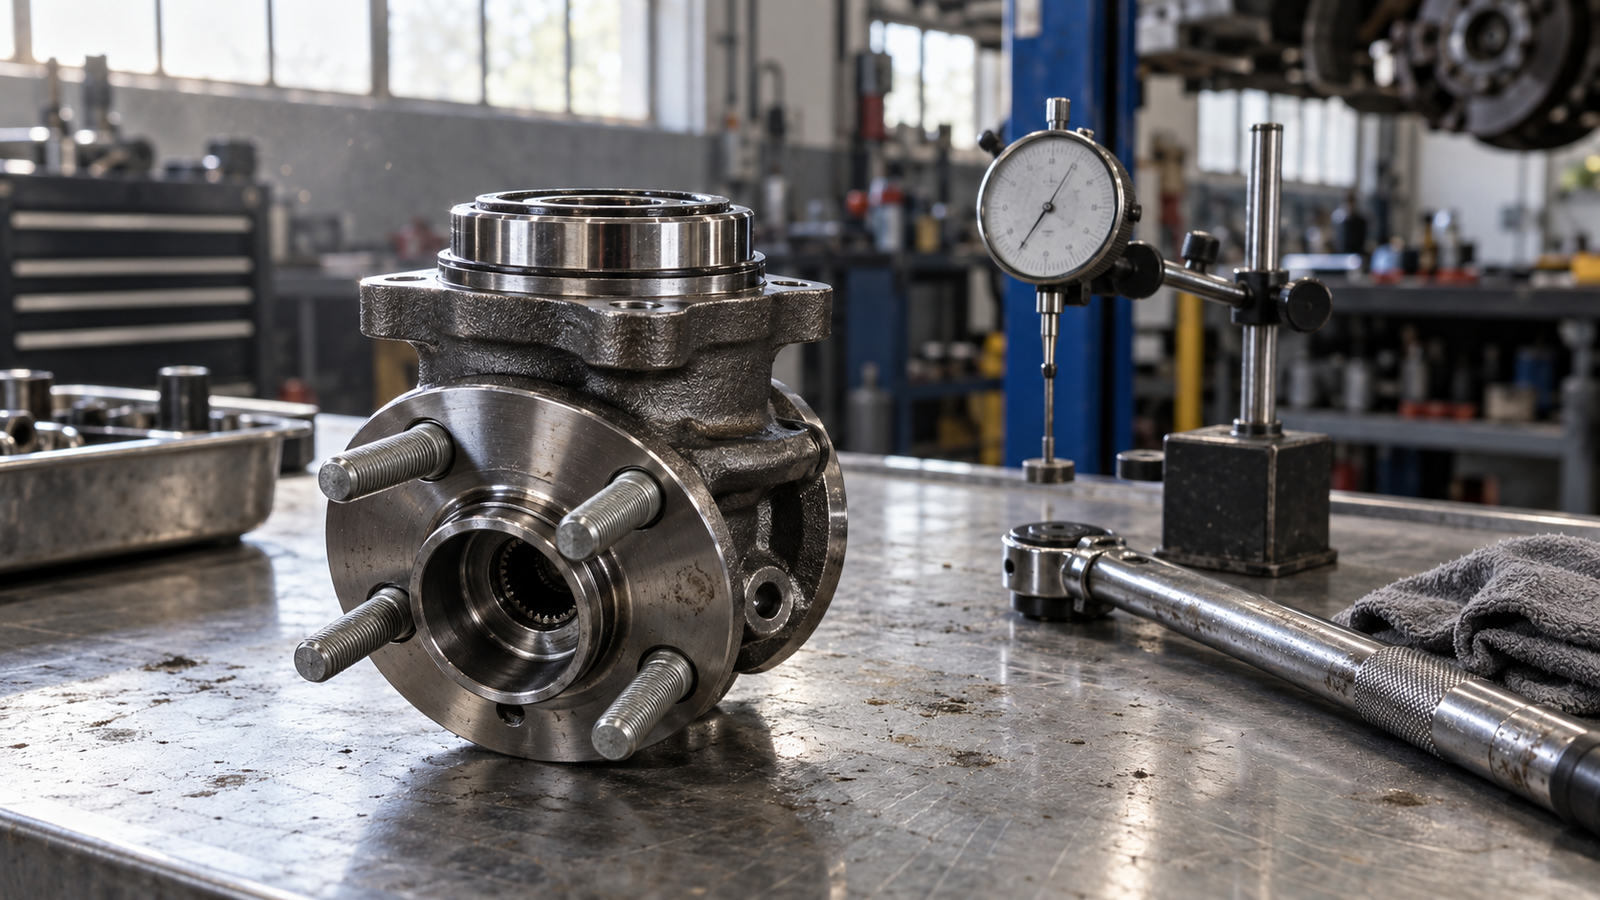
Bearing Maintenance Checklist: 9 Checks That Prevent Failure
What Is a Bearing Maintenance Checklist for Wheel-End Bearings?
A bearing maintenance checklist is a short, repeatable inspection routine covering five observations on every wheel-end bearing: noise and vibration, play at the wheel, seal and grease condition, running temperature and mounting hardware. For automotive hub bearings, including HJDP brand wheel hub bearings supplied through jnhjdp.com, it is used at every brake or tire service, after any wheel impact, and again at goods-in inspection. It prevents most premature failures because contamination, incorrect installation and lost preload appear as seal weep, play or heat long before a raceway spalls.
A checklist is a decision tool rather than a parts list. It converts a vague complaint into one of four actions: monitor, re-torque, replace or investigate the installation. Sequencing matters, because the observations that identify a bearing problem must be made before anything is dismantled, and because the inputs that shorten life are visible long before fatigue becomes audible.
The scope covers every bearing in the running gear that carries wheel or driveline load: first-, second- and third-generation hub bearings, complete hub assemblies, tensioner and idler bearings, CV joint assemblies, clutch release bearings, and the tapered and cylindrical roller bearings used in axles, differentials and trailer hubs. Each position has a different load path and failure pattern, so items shift between them. The five core observations apply to all of them, which is why a distributor can standardise one checklist across a whole range.
Which Positions and Load Cases Should the Checklist Cover?
Wheel-end bearings carry combined radial and axial load, and the ratio depends on position. A front hub on a front-wheel-drive car carries the front corner weight plus cornering load, and on a driven axle it also transmits torque through the splined hub. A trailer hub with a serviceable tapered roller pair carries load plus thrust under braking, and depends on a correctly set endplay to share load between its two rows. A tensioner bearing sees high speed, belt tension and engine-bay heat but almost no vehicle load. A clutch release bearing sees intermittent thrust each time the pedal moves, and it fails from misalignment more often than from fatigue.
Why Do Wheel Bearings Fail Before They Become Audible?
Damage usually begins as a surface or sub-surface change that produces no sound. Water or abrasive dust passing a seal lip displaces grease and starts a corrosion or wear patch on the raceway; a press fit installed slightly off-axis concentrates load on one zone; a bearing stored or transported without support develops false brinelling where the balls sat still under vibration. It becomes audible only when the damaged area spalls and the rolling elements cross a pit several times per revolution.
That lag is what makes the checklist valuable. Seal weep, a small temperature difference between hubs, slight play or a grease stain on the inner wheel face are all early evidence. Once the bearing drones, the checklist can only confirm replacement.
How Do You Build a Checklist by Bearing Type and Generation?
A checklist should be written per bearing family, not per vehicle model, because the inspection method follows the bearing construction. Generation, rolling element type, sealing arrangement and mounting method determine what a technician can actually see and measure in place.
| Bearing family | Typical position | Dominant load | Checklist emphasis |
|---|---|---|---|
| Gen 1 hub bearing (sealed double-row angular contact, no flange) | Pressed into knuckle or hub, driven and non-driven axles | Radial plus axial, preload set at assembly | Bore and press-fit condition, seal lips, rotation feel |
| Gen 2 hub unit (flanged outer ring) | Bolted to knuckle or axle, often with ABS encoder | Radial plus axial | Flange bolt condition, mating face corrosion, encoder ring |
| Gen 3 hub unit (both flanges integrated) | Bolted cartridge, wheel mounts to hub flange | Radial, axial and drive torque | Axle nut, spline wear, ABS signal, flange runout |
| Tapered roller pair (serviceable) | Trailer hubs, older axles, some light truck applications | High radial plus thrust | Endplay setting, grease condition, cup seating, seal |
| Cylindrical roller bearing | Gearbox, differential, industrial hubs | Very high radial, limited axial | Lubricant cleanliness, housing fit, axial location |
| Tensioner and idler bearing | Accessory belt drive | Belt tension radial load, high speed | Pulley squareness, belt alignment, seal weep, spin noise |
| CV joint assembly | Outboard fixed and inboard plunging shaft ends | Torque plus articulation | Boot integrity, grease loss, articulation play |
| Clutch release bearing | Between release mechanism and pressure plate | Intermittent axial thrust | Guide tube wear, clearance, pedal feel |
What Changes Between First-, Second- and Third-Generation Hub Bearings?
The generation number describes how much of the wheel end is integrated into the bearing, and it changes what a buyer must specify. A first-generation hub bearing is a sealed double-row angular contact bearing without a flange: it is pressed into the knuckle or hub and retained by interference fit, so bore tolerance and installation force matter more than anything printed on the carton. A second-generation unit adds a flange to the outer ring, so it bolts to the knuckle or axle and can carry an ABS encoder in the seal. A third-generation unit integrates both flanges: the inner ring becomes the wheel hub and also carries drive torque, wheel studs, brake disc location and usually the magnetic encoder read by the ABS sensor.
For a buyer, the consequence is that same size is not the same part. A third-generation unit must match bolt hole count and pitch circle, pilot diameter, flange offset, spline type, encoder pole count and sensor position, not only bore and outer diameter. Because the difference between a bearing and a complete assembly changes cost structure and installation method, compare a wheel hub bearing with a wheel hub assembly before a range is finalised.
How Do Material, Heat Treatment and Clearance Affect the Checklist?
Most automotive hub bearings are made from through-hardening bearing steel of the 100Cr6, GCr15 or SAE 52100 family, hardened and tempered to a martensitic structure, with flanges or local zones sometimes induction hardened. Heat treatment governs hardness, retained austenite and dimensional stability, which is why two bearings with identical dimensions can behave differently in service. It is invisible in a finished part, so incoming inspection relies on dimensions, rotation feel, seal condition and supplier documentation rather than appearance. The material side is examined further under wheel hub bearing steel quality.
Clearance and preload are set at assembly in sealed hub units and cannot be adjusted in service. What a technician can assess is whether the unit turns with light, even drag and no detectable play; a unit that spins freely with a rattle, or feels notchy at one point, is suspect regardless of its markings. Serviceable tapered roller pairs are the exception: endplay is set during installation, and a hub set too tight will overheat while one set too loose will hammer its cups. Their checklist must record the measured endplay and the method used.
Which Checks Belong on Every Bearing Inspection?
The nine steps below are written for a wheel-end bearing on a vehicle, and most transfer to a bench inspection of a removed unit. Sequence matters: road test and play check come first, because dismantling destroys the evidence.
- Confirm the part number and service history. Record the installed number, mileage or hours, and any earlier replacement at that corner. A repeat failure within a short period points to installation, bore damage or brake drag rather than to the bearing itself.
- Record the noise signature on a road test. Note the speed band, whether the noise changes when cornering left or right, and whether braking alters it. Cornering loads and unloads the bearing, which is the clearest in-vehicle way to separate bearing noise from tire and brake noise.
- Check play on two axes. With the wheel raised, grip the tire at 12 and 6 o clock, rock it and feel for movement; repeat at 3 and 9 o clock. Movement on both axes suggests bearing play or a loose axle nut; movement on one axis usually points to steering or suspension.
- Inspect the seal and the grease line. Look for cracked or lifted lips, embedded grit and wet grease at the inner and outer seals. A thin dry film is normal; a spreading wet stain is not.
- Compare running temperatures. After a controlled drive with minimal braking, compare hub temperatures side to side and against ambient. A persistent difference between two hubs doing the same work deserves investigation before noise appears.
- Check the mounting hardware. Verify axle nut or flange bolt condition, thread damage, washer type, snap ring seating and, where fitted, the ABS sensor air gap and harness routing. A reused or under-torqued fastener changes bearing preload.
- Inspect the mating surfaces. Look for fretting corrosion, rust scale, burrs and previous installation marks in the knuckle bore or on the flange face. These cause misalignment, concentrate load and shorten life.
- Rule out runout first. Measure lateral and radial runout at the wheel flange and check for a bent rim, a damaged tire or debris trapped between disc and hub face. A meaningful share of bearing complaints are really runout complaints.
- Record the result and the decision. Write down the measurements, attach photographs and state whether the unit was released, re-torqued or replaced, with the reason. That record is what turns a checklist into usable failure data.
What Should the Written Record Contain?
A usable record has six fields: date and odometer or hour meter, position, symptom with its speed band, measured values such as play, temperature, runout and endplay, action taken, and the part number of anything fitted. Photographs of the seal and the removed raceway add most of the diagnostic value for very little effort. Where the same part fails repeatedly, the record is the only way to separate a product problem from an installation problem, and it feeds the structure described in this wheel hub warranty return data checklist. Consistency matters more than the exact interval; a documented repeat schedule is set out in these wheel bearing maintenance schedule recommendations.
How Do Seal and Lubricant Checks Prevent Most Bearing Failures?
Seal integrity is the most useful single item a checklist can verify, because contamination is the dominant cause of premature wheel bearing failure in service. A hub bearing seal is a lip seal, usually with a primary lip and an additional dust lip running on a ground surface of the inner ring, or a cassette design for better exclusion. Units with ABS integrate a magnetic encoder into the seal body, so the seal is also a sensor component and must never be replaced with a plain seal.
What Does Grease Weeping at the Seal Actually Mean?
A thin oily ring at the seal lip can be normal bleed from grease that has separated slightly in service. A wet, dust-attracting stain that spreads outward, or grease thrown onto the inner wheel face, indicates lip damage, internal pressure from overheating, or a seal damaged during installation. Bleed is monitored, weep is investigated, and thrown grease means replacement, because the grease volume that keeps the bearing alive has already been lost.
Workshop practice decides much of a seal life. High-pressure washing aimed at the seal, solvent sprayed into the seal area and compressed air spun through a dry bearing all shorten it. Sealed hub units cannot be re-greased: the fill is measured at assembly and the grease type is matched to the seal and operating temperature, so opening a unit introduces the contamination the seal exists to exclude. Serviceable tapered roller hubs are the exception, provided the correct grease family and cavity fill are used. Seal construction and inspection points are covered in this guide to wheel bearing seal inspection.
Which Grease and Storage Conditions Should Buyers Specify?
Two questions are worth settling before an order: the grease family and the storage condition. Grease families are not freely interchangeable, because mixing a polyurea grease with a lithium-complex grease can soften the structure and cause leakage, so the service fill should follow the original specification. Storage matters because a bearing that sits for months in a humid warehouse can corrode even inside packaging that looks intact if the wrap is breached. Keep cartons closed, off concrete floors, away from vibration and out of sunlight, and check for water marks and crushed corners on arrival.
Which Failure Sign Points to Which Root Cause?
Matching an observation to a probable cause demands experience, and the most useful discipline is recording what was seen rather than what was assumed. The table pairs common observations with the causes that most often produce them.
| Observation | Probable cause | How to confirm |
|---|---|---|
| Speed-related hum or drone from one corner | Raceway spalling or a damaged ball | Road test with load transfer, then read the raceway |
| Click or clunk on full lock | Worn CV joint rather than hub bearing | Check boot condition and articulation play |
| Play at 12 and 6 o clock | Bearing play or loose axle nut | Verify nut torque and recheck |
| Play at 3 and 9 o clock only | Steering or suspension play | Check track rod and ball joints |
| ABS warning plus hub play | Encoder ring damage or sensor air gap | Read fault codes, inspect encoder |
| Grease thrown onto the inner wheel face | Seal lip failure or overheating | Inspect seal, measure hub temperature |
| Blue or brown discoloration on the raceway | Excessive preload or brake drag | Check brake drag and endplay setting |
| Even indentations spaced like the ball set | False brinelling from storage or transport vibration | Review storage, handling and incoming inspection |
| Spalling concentrated on one side of the raceway | Misalignment or a bent flange | Check mating face and flange runout |
| Rust streaks in reddish grease | Water ingress past the seal | Inspect seal path and wash practice |
A removed bearing is a record of its own service life and should be read before it is discarded. Spalling position indicates load zone and alignment, grease colour indicates temperature, and seal lip condition indicates the environment the part worked in. Photograph the raceway and both lips before cleaning. Systematic cause analysis is expanded in this reference on wheel bearing failure causes, and it is the correct basis for a warranty discussion, because a claim without an observed cause is only an opinion.
When Should a Bearing Be Replaced Rather Than Monitored?
Replacement is correct when any of four conditions is present: measurable play, audible noise that changes with cornering, grease loss at the seal, or a temperature difference that persists after a controlled drive. Monitoring suits only the earliest signs, such as a faint oil ring or a cosmetic mark on the flange, and only when the unit is rechecked at a defined interval. Because a seized hub can damage the knuckle, ABS sensor and brake disc, waiting is usually the more expensive choice.
How Should Importers Use the Checklist at Goods-In?
Importers and chain buyers should run a shortened version of the same checklist on incoming stock, because warehouse failure modes differ from vehicle failure modes. At goods-in the questions are whether the part matches the drawing, whether seal and encoder survived transport, and whether the batch can be traced. Dimensional verification comes first: bore, outer diameter, width or flange offset, bolt hole count and pitch circle, pilot diameter, and spline or stud specification, measured against the drawing rather than against a competitor sample.
Which Drawing Parameters Should Be Verified First?
Start with parameters that cannot be corrected later: bore and interference fit, flange offset, bolt pattern, encoder type and pole count, and seal construction. Then check the characteristics a technician would feel, such as rotation smoothness, absence of axial play in a sealed unit, seal lip condition, grease at the lip line and clean internal packaging. Marking and batch traceability come last but should not be skipped, because a batch code is what makes a field report resolvable. The wheel hub bearing RFQ checklist covers the questions to settle before the order rather than after arrival.
How Should One Checklist Be Reused Across a Range?
Write it once per bearing family and generation, then attach the drawing number and revision. When a part number is superseded, the checklist follows the new drawing and the old revision is archived rather than deleted, so failures on older stock can still be interpreted; wheel hub bearing supersession management explains how to keep those mappings clean. Supplying dealers with a one-page version, five observations and nine steps on one sheet, is one of the cheapest technical support measures a distributor can offer.
HJDP wheel hub bearings are supplied by Jinan Huayuan Auto Bearing Co., Ltd. through jnhjdp.com for aftermarket replacement and OEM programmes, with drawing and sample confirmation, custom packaging and private-label options. Fitment for any part number is confirmed by drawing and sample, and this checklist works with branded or neutral packaging as long as the drawing revision is identified.
Bearing Maintenance Checklist: Frequently Asked Questions
How often should wheel bearings be checked?
Check them at every brake service, tire rotation or scheduled inspection, and again after any kerb strike, deep water crossing or accident repair. Vehicles used on poor roads, in dust or under heavy loads should be checked more frequently. The interval matters less than consistency and recording, because a comparison with the previous reading is what reveals a trend.
Can a sealed wheel hub bearing be re-greased?
No. Sealed hub units are greased for life with a measured fill and a grease type matched to the seal. Opening the unit to add grease admits the contamination the seal is designed to exclude and usually shortens life. Only serviceable tapered roller hubs can be cleaned, inspected and repacked, and then with the correct grease family and cavity fill.
What is usually the first sign of a failing wheel bearing?
A speed-dependent hum or drone that changes when the vehicle corners is normally the first audible sign, and it often appears before measurable play. A temperature difference between hubs and a grease stain at the seal can precede the noise. Play, ABS faults and vibration usually appear later, which is why a checklist records noise and temperature as well as movement.
What should be checked on incoming bearing shipments?
Verify drawing conformance first: bore, outer diameter, flange offset, bolt pattern, encoder type and seal construction. Then check rotation feel, axial play, seal lip condition and packaging integrity. Confirm that marking and batch codes are present and that documents match the order, and keep a sample with the inspection record so a later field report can be traced to a specific batch.


