
What Is SA2H-3104100 Rear Wheel Hub Assembly? Buyer Guide
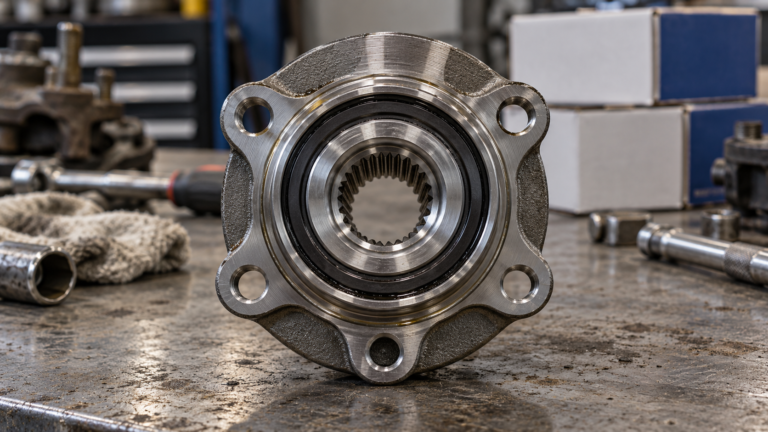
The SA2H-3104100 is a rear wheel hub assembly: a sealed, pre-assembled unit that carries the rear wheel and contains the bearing, hub flange and ABS interface. Buyers usually need it when a rear hub on a BYD HY3-platform vehicle becomes noisy or develops play. In service the assembly is replaced as a complete unit rather than re-shimmed. The part number fixes one configuration only, so bearing generation, bolt pattern, tone-ring type and seal design must be confirmed on the drawing and on a physical sample before ordering.
What Is the SA2H-3104100 Rear Wheel Hub Assembly?
What does a rear hub assembly do?
A rear wheel hub assembly does three jobs at once: it locates the wheel on the axle, carries vehicle weight and cornering force through the bearing, and provides the mounting face for the brake disc and wheel. Because races, grease, seals and wheel flange are matched when the unit is built, the complete assembly is replaced rather than adjusted. The SA2H-3104100 rear wheel hub assembly is one such rear-position unit, listed by HJDP, the brand of Jinan Huayuan Auto Bearing Co., Ltd. at jnhjdp.com.
Which components sit inside the sealed unit?
The outer housing is normally a forged or cast flange with four or five wheel studs pressed into it. Inside sit two rows of rolling elements in a double-row angular contact arrangement, running on hardened raceways ground into the rings. A magnetic encoder ring for the ABS sensor is bonded to a seal or to the inner ring; older designs use a toothed tone ring instead. Grease is filled for life, and two seals, one inboard and one outboard, keep water and grit out. On a driven rear axle the inner bore is splined; on a non-driven axle it is a plain bore with a stub or flange.
What does the part number not tell you?
A number such as SA2H-3104100 identifies one build configuration, not a family of interchangeable parts. It does not tell you the bearing generation, the bolt circle, the encoder pole count, the seal lip compound or whether mounting bolts are in the box. Two suppliers can quote the same number with different internal content, which is why a drawing review plus a physical sample is the only reliable way to compare offers. Any catalogue row that claims fitment across a list of models without dimensions is a starting point, not verification.
Which Wheel Hub Generation Is It, and Why Does That Change the Job?
The generation decides what arrives in the box and how much of the axle has to come apart, so settle it before comparing samples. Generation 1, 2 and 3 hub bearings are not interchangeable, and confusing them is one of the most common reasons a hub order is returned.
Generation 1: bearing only
A first-generation hub bearing is a double-row bearing whose outer ring presses directly into the knuckle or hub carrier, while the wheel flange is a separate part pressed onto the inner ring. Installation needs a press, the inner ring must be supported correctly, and the axle nut sets the preload. Buyers who order by number alone sometimes expect a complete assembly and receive a bare bearing.
Generation 2: flanged bearing unit
A second-generation unit bolts to the knuckle through a flange formed on the bearing outer ring, but the wheel hub flange is still a separate component pressed into the bore. It removes the press operation at the knuckle while keeping a press step for the flange, so workshop time falls but does not disappear.
Generation 3: complete hub assembly
A third-generation unit integrates wheel flange, double-row bearing, mounting flange and ABS encoder in one sealed part. It is fitted with hand tools, torqued to the vehicle manufacturer’s published figure and needs no preload adjustment. Most late-model passenger car rear corners use this arrangement or a close variant, and the number discussed here is listed as a rear assembly of this type.
| Feature | Generation 1 | Generation 2 | Generation 3 |
|---|---|---|---|
| What arrives | Bearing only | Bearing with outer mounting flange | Complete hub assembly with wheel flange |
| Mounting | Pressed into knuckle, separate hub | Bolted to knuckle, hub pressed in | Bolted to knuckle or axle as one part |
| Preload | Set by axle nut torque | Set at build | Set at build |
| ABS interface | Usually a separate tone ring | Encoder inside the unit | Encoder integrated in the unit |
| Workshop tooling | Press, drifts, torque wrench | Press and torque wrench | Hand tools and torque wrench |
| Main buyer risk | Wrong preload, damaged inner ring | Flange pressed off-axis | Mismatched encoder or bolt pattern |
Generation also changes ordering discipline. A rear hub is often ordered together with the SA2H-3103100 front wheel hub assembly for the same vehicle, and the two are built to separate drawings, so one confirmation cannot cover both.
How Do You Read a Rear Hub Drawing Before You Order?
A drawing review answers in minutes what a catalogue description cannot: whether the part physically fits, and whether two suppliers are quoting the same thing. Read it in a fixed order, starting with the mounting interface and working inward.
Flange and wheel-mounting dimensions
Check stud count, stud thread, bolt circle diameter, hub pilot bore and the flange offset measured from the mounting face. One millimetre of error in pilot diameter is enough to seat the wheel off-centre, and a different offset moves the brake disc relative to the caliper bracket.
Bearing bore, spline and axle interface
Confirm the inner bore diameter and, on a driven axle, the spline count, spline length and axle-nut thread. Spline forms change between model years even when the visible flange is identical. Where a stub axle is used, check the seat length and any shoulder that fixes axial position.
Encoder type and sensor position
Identify whether the encoder is a magnetic ring or a toothed wheel, note the pole count, the radial position of the sensor face and the nominal air gap. A hub that fits mechanically but carries the wrong encoder produces a clean-looking installation, an ABS lamp and stored wheel-speed codes.
Tolerances, clearance and preload
The drawing should state raceway tolerance class, internal clearance group and flange face runout limits. In a sealed hub unit the clearance is fixed at build, so the buyer’s task is to verify it on the sample, not to adjust it. Flange face runout is the figure most often missing from supplier drawings and the one that later shows up as brake judder.
| Drawing parameter | What it controls | What goes wrong if it is wrong |
|---|---|---|
| Bolt circle and stud count | Wheel seating and clamp load | Wheel will not sit flat, nuts lose torque |
| Hub pilot bore | Centring of wheel and disc | Vibration and stud fatigue |
| Flange offset | Disc and caliper position | Contact with caliper bracket, wrong track width |
| Inner bore and spline form | Axle engagement and torque transfer | Spline wear, slip or fracture under load |
| Encoder type and air gap | Wheel-speed signal quality | ABS lamp and false fault codes |
| Raceway tolerance and runout | Noise, heat generation, disc runout | Rumble, judder, shortened service life |
What a drawing will not tell you
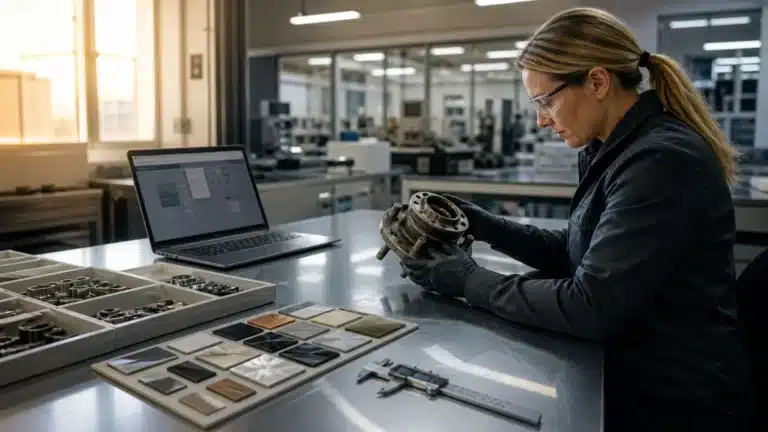
Steel grade, heat-treatment depth, grease type and fill quantity, seal lip compound and surface coating usually sit on a separate specification sheet, not on the dimensional drawing. Ask for both. HJDP’s stated process is drawing and sample confirmation before production, together with custom packaging and private-label marking for buyers who resell under their own brand, so the specification is agreed in writing rather than inferred from a photo.
Which Bearing Type, Steel and Seal Design Suit the Duty?
For a fixed mounting envelope, the internal choices decide how long the unit lasts in a given market, and they are exactly what a buyer cannot see from outside. Compare suppliers on bearing type, material, clearance and sealing rather than on the number alone.
Tapered roller, cylindrical roller or double-row ball?
Double-row angular contact ball bearings dominate passenger car hub units because they carry combined radial and axial load in a compact envelope with low friction. Double-row tapered roller bearings suit higher axial load and shock, such as heavier vehicles, towing duty and some SUV rear axles, and tolerate more misalignment at the cost of friction and heat. Cylindrical roller bearings carry high radial load with almost no axial capacity and belong in gearbox or industrial positions rather than in sealed car hubs. HJDP’s automotive range covers hub units, tapered and cylindrical roller bearings, tensioner and tensioner pulley bearings, CV joint assemblies and clutch release bearings, which matters when one vehicle platform needs several of these at once.
Material and heat treatment
Rings and rolling elements are normally made from through-hardening bearing steel such as GCr15, the Chinese designation for 100Cr6-equivalent steel, hardened and tempered to a martensitic structure and then ground. Flanges are forged or cast steel, sometimes induction hardened at the stud seats, while case-hardening appears where impact loading is expected. Hardness cannot be checked at the loading dock, so the practical controls are a written heat-treatment specification and consistent hardness results across samples from the same batch.
Clearance and precision class
Dimensional and runout tolerances follow ISO 492 grades, with ABEC numbers as the North American equivalent; both describe geometry, not behaviour in service. The number that matters for a hub is internal clearance, quoted in groups such as C2, CN and C3, because it sets operating temperature, noise and play. Too little clearance in a hot market runs the grease hot and discolours the raceway; too much allows disc runout and pad knock-back. Because a sealed unit is set at build, verify clearance by measurement on the sample instead of planning to adjust it.
Sealing and grease
Seal design decides service life in dusty or wet markets more than any other single feature. A single lip seal is the minimum; a cassette or labyrinth seal with a secondary lip and a steel shield is the appropriate choice for unpaved roads, seasonal flooding and winter salt. Grease should be a high-temperature lithium-complex or polyurea type compatible with the seal elastomer, filled to a controlled percentage, since overfilling churns and overheats while underfilling starves the inboard row. Ask which grease, how much, and which elastomer.
What Loads and Road Conditions Change the Specification?
A rear hub carries radial load from vehicle weight and cornering, axial load from cornering and camber, and on a driven axle torque through the spline. Which of those dominates depends on where the vehicle is driven, so the specification should be chosen per market rather than once for all markets.
Where the load goes in a rear corner
Wheel centre offset from the bearing plane creates a bending moment shared between the two rows, and the outboard row usually carries more of it, which is why outboard raceway damage and outboard seal failure are the most common findings. Kerb strikes and potholes add short high peaks that brinell the raceway instead of wearing it smoothly, so a hub can fail at low mileage with no gradual wear history.
Heat, dust, water and salt
In Gulf markets, ambient heat combined with brake heat raises grease temperature and speeds oxidation while fine dust works at the seal lip. In Southeast Asia, standing water and high humidity drive corrosion and grease emulsification. In CIS markets, road salt and freeze-thaw cycles attack flange coating and the metal case of the seal. On unpaved roads in parts of South America and Africa, seal robustness and radial capacity matter more than friction. These are operating conditions to design for, not assumptions about any single country.
Turning market conditions into a specification
Match seal class to water and dust exposure, grease to the temperature band, coating to the salt regime, then confirm the flange geometry against the drawing. Distributors serving several markets should hold one specification per market, because a hub that lasts in a hot coastal city can fail early on a salted winter road for reasons no dimensional check would reveal.
How Do You Install and Replace a Rear Hub Assembly?
Most premature hub failures are installation failures rather than manufacturing failures. The sequence below is written for a bolted rear hub assembly; a pressed first- or second-generation bearing needs the additional press steps its design requires.
- Verify the part before dismantling anything. Compare flange geometry, stud pattern, encoder type and any casting marks with the old unit and with the drawing, subject to confirmation by drawing and sample.
- Loosen the wheel nuts on the ground, raise the vehicle, support it on stands and remove the wheel.
- Remove the brake caliper and hang it aside without straining the hose, then take off the disc retaining screws and the disc.
- Disconnect the ABS sensor connector and, where the design requires it, withdraw the sensor before the hub moves; a seized sensor breaks easily.
- Remove the axle nut on a driven axle and discard it, since most are single-use. On a bolted hub, remove the mounting bolts and note any thread-locking compound or corrosion.
- Clean the knuckle face and bore. Remove rust scale and burrs, check for cracks around the bolt holes and confirm the face is flat; debris trapped behind the flange tilts the hub and destroys runout.
- Fit the new assembly squarely by hand. Never draw it in with the mounting bolts and never strike the flange or outer ring. If it will not seat, find out why instead of forcing it.
- Torque the fasteners in a cross pattern to the vehicle manufacturer’s published figure with a calibrated wrench, fitting a new axle nut where one is specified.
- Refit disc, caliper and wheel, reconnect the sensor and check the air gap if the design allows adjustment.
- Press the brake pedal to seat the pads, road test, then re-check torque after the first drive and confirm no ABS lamp remains lit.
What should you check when the shipment arrives?
Goods-in inspection costs minutes per carton and prevents warranty disputes later. Check the following before signing off the delivery:
- Part number and quantity against the purchase order, and one carton label against the part inside it.
- Flange finish for rust, coating damage or machining marks that suggest rework.
- Seal lips for cuts, distortion, rolled edges or a missing shield.
- Free rotation by hand: smooth with light drag, no click and no roughness at any point of the turn.
- Presence and position of the encoder ring, and absence of metal debris on it.
- Stud thread condition and stud press fit, checked by feel and a thread gauge.
- Key dimensions against the drawing with a caliper: pilot bore, bolt circle, flange offset and overall height.
- Retention of one unit as a reference sample, so later shipments can be compared against the approved part.
What Do Rear Hub Failures Look Like, and What Causes Them?
Rear hub failures follow a small number of patterns, and the symptom usually identifies the cause before anything is dismantled.
Noise that changes with speed or cornering
A rumble or growl that rises with road speed and shifts as the vehicle is loaded from side to side points to raceway damage, usually spalling or brinelling on the outboard row. Noise that changes when one side is unloaded is a strong indicator; noise that stays identical regardless of load is more likely tyre or brake related.
Play, vibration and brake judder
Visible movement at the wheel with the car raised, uneven tyre wear, or judder that appears after new discs are fitted all point to excess clearance or flange runout. Check mounting bolt torque and axle nut condition first, then dial-test the flange face before condemning the bearing.
ABS lamp and wheel-speed codes
A wheel-speed fault on one corner usually means encoder damage: a cracked magnetic ring, metal debris stuck to the encoder, or a sensor pushed out of its air gap during installation. Clean the area and re-check the gap before replacing the hub, because a fair number of replaced hubs are sound units with a disturbed sensor. If one side has failed, inspect the rear hub assembly listing for the matching configuration rather than fitting a part chosen by number alone.
Why a new hub fails within a few thousand kilometres
Almost always installation: dirt or rust trapped between flange and knuckle, impact fitting, over-torque on the axle nut, a reused single-use nut, a seal lip rolled during fitting, or an encoder that does not match the vehicle system. None of these are visible from outside, which is exactly why drawing and sample confirmation exist.
| Symptom | Most likely cause | First check |
|---|---|---|
| Rumble rising with speed, changes when cornering | Raceway spalling or brinelling | Raise the wheel, spin by hand, feel for roughness and play |
| Play at the wheel, uneven tyre wear | Excess clearance or a loose fastener | Mounting bolt torque and axle nut condition |
| ABS lamp and wheel-speed code | Encoder damage or incorrect sensor gap | Encoder ring surface and sensor seating |
| Judder with new discs | Flange face runout or dirt behind the flange | Dial-test the flange face |
| Grease weeping at the seal | Seal lip damage or overheating | Seal condition and grease colour |
What Else Do Buyers Ask About the SA2H-3104100?
Is the SA2H-3104100 the same part on every BYD HY3 variant?
Not necessarily. One number can cover several build configurations, and variants may differ in encoder type, flange offset or stud thread. Ask for the drawing and match its dimensions against the unit you are removing, or send measurements and photos of the original. Fitment is confirmed by drawing and sample, not by a model list.
Can a rear hub assembly be replaced without a press?
It depends on the generation. A third-generation hub assembly bolts on with hand tools and a torque wrench, with no press needed. A first- or second-generation bearing needs a press to move the bearing or the hub flange, and using a hammer instead usually damages the raceway before the part reaches the road.
How can I tell whether a rear hub bearing is failing?
The usual signs are a speed-related rumble that changes when you load one side, visible play at the wheel with the car raised, uneven tyre wear, and a wheel-speed or ABS fault code. Judder with new discs can also indicate flange runout. Confirm by feel and measurement rather than by noise alone.
Does HJDP supply this hub under a buyer’s own brand?
Yes. HJDP, the brand of Jinan Huayuan Auto Bearing Co., Ltd. at jnhjdp.com, provides drawing and sample confirmation, custom packaging and private-label marking for importers, wholesalers and parts chains reselling in the Middle East, Southeast Asia, South America, Africa and CIS markets. Fitment and specification are agreed first, then the label is applied.